
After having collected a startling amount of print inventory over the last couple years, I've started working on taking photographs of my prints in an effort to sell some of the inventory. Because I can't damage any walls of the studio, and because I wanted the images to "float" against a white background, I ended up designing and building a custom fixture to hold the prints to be photographed.
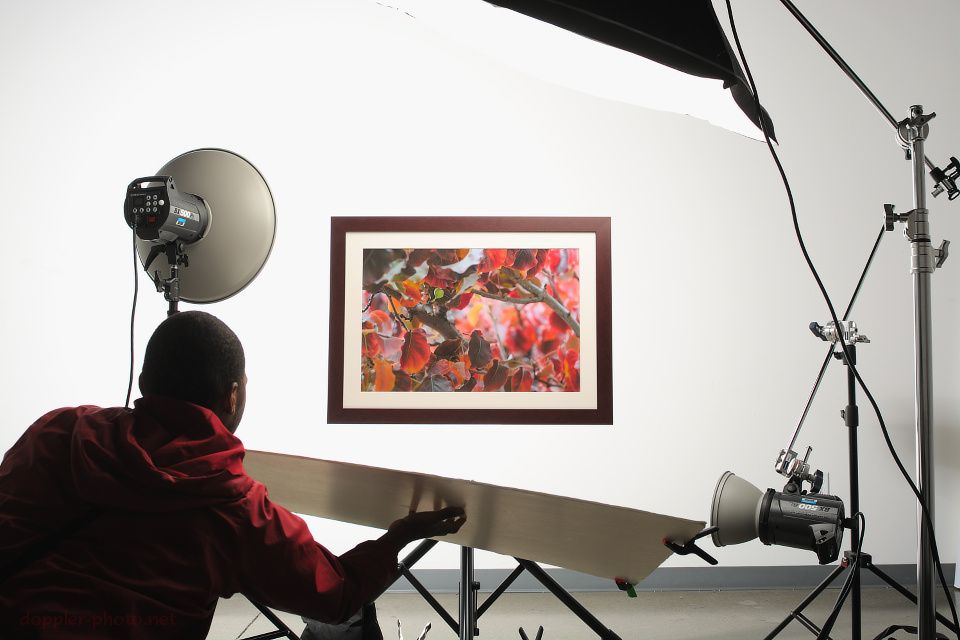
After finishing a prototype, I took the rig for a trial run, in what was my first time setting up and using studio strobes. I ended up using a ~7-foot octa as the key light, with some (not enough) reflected fill from the bottom. The other two lights are to (left) blow out the background, and (lower-right) blow out the sheet of paper hiding the exposed portion of the stand.

Nearly all of the pieces to be photographed are custom-framed, and thus are reasonably expensive and time-consuming to replace (and some are one-of-a-kind), so a combination of redundancy and over-provisioning was the name of the game. My spec for the system was to handle a 40-pound frame with near-zero chance of the frame ending up on the ground. The heaviest pieces I've done so far, two 24"x36" pieces with glass, should still fit within that envelope, and at this point I'm pretty confident that the system would be able to handle a minor earthquake without issue.
In the prototype, the two main pieces of wood are attached with two small bolts per plank, with a metal framing bracket actually connecting them. The final version will have a pair of brackets, tied together with three bolts, and holding the end of the horizontal plank flush against the back of the vertical plank.
The dowel is intended to locate the fixture both laterally and longitudinally in the head of the work stand. The stand's clamp closes on the dowel to prevent it from moving, and the dowel is again attached to the horizontal plank with bolts. The dowel is slightly wider than the planks themselves, which gives the setup plenty of strength to withstand any yaw forces.
Finally, the black thing near the left of the fixture is a self-tightening strap to lock the pitch of the fixture relative to the head of the workstand. The final version will need adjustable pitch (even if just using some shims and the same strap) to make it easier to square the face of the print to the orientation of the camera sensor.
Oh! I should note that I picked the Spin Doctor Pro G3 bike stand for its combination of portability, stability, robustness, and low cost. The large-diameter tubes are plenty rigid, and all of load-bearing components (including clamps) are constructed from metal.

This is the face of the carrier fixture. The wire hangers are rated for 30lbs each, and given their shape, are extremely unlikely to fail in the first place. For the final, I'll need to remember how to drive a nail ;o) I also did a poor job of laterally centering the fixture on the bike stand, but it seemed to make little difference. Even with the current two-bolt arrangement, the setup has plenty of roll stiffness and stability, thanks in large part to the ability to clamp the dowel.
This also shows the simple paper setup used to hide the central tube of the work stand. That sheet of paper is the "magic" of the floating effect, yet is probably the simplest part of the entire contraption.

This was the first image that I tried. On the plus side, the color tones of the print itself are great; this is the best it's ever looked, and demonstrates how it would look in a properly-lit environment. Beyond that, the lighting setup does a good job of conveying the rounded shape of the frame, especially in the top half.
In what would become a repeating theme for that session, the bottom half of the frame is under-lit, and consequently looks flat and lacks detail. Moreover, the frame looks decidedly non-rectangular. I wouldn't be surprised if this particular frame were out-of-square, but that appearance is definitely exaggerated by some keystoning (that is, the print and the camera aren't properly aligned).
Finally, the background light level wasn't set properly, and so the background isn't fully overexposed in this shot — with a good monitor, you can differentiate the sheet of paper from the backdrop.

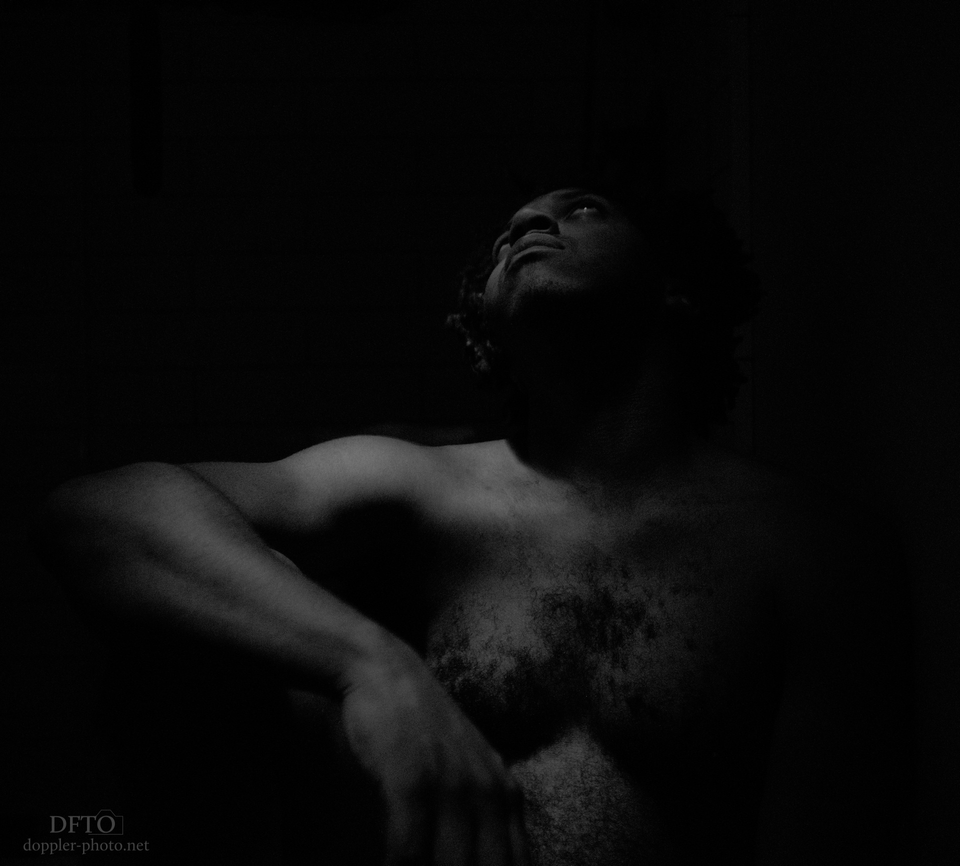
This was the second image, and the lighting here definitely needs some work. The defining feature of this frame moulding is the combination of a matte-black exterior with a shiny piano-black interior. I managed to get a little light on the bottom of the frame with a reflector, but it's still got no real depth. I also need to add another light somewhere to illuminate the shiny surface of the piano-black band.
From a slightly more technical perspective, there's some combination of keystoning and pincushion distortion, as well as some chromatic aberration at the edges of the frame. Shooting with a macro/micro prime lens rather than a general-purpose zoom should clean a lot of this up, especially stopped all the way down to f/5.6 or f/8.

I again had some trouble with the lighting on this shot. The top-right corner is too hot, which is most apparent in the overexposure of the cream-colored mat. The colors of the print are generally pretty good, but as the light falls off from the top-right corner to the bottom-left, so does the color saturation. The frame is a tiny bit too hot in the top-right corner, but is under-lit almost everywhere else. Oh, well…
Welp, that's my journey so far. It's been pretty educational for me, and I hope y'all learned a little as well. Until next time